Workflow
Workflows define the lifecycle of an application, a document, an accommodation request, or another business process. They determine the statuses that records move through and the actions that trigger transitions between those statuses. You can create, view, and modify workflows to align with your organization's review and approval processes.
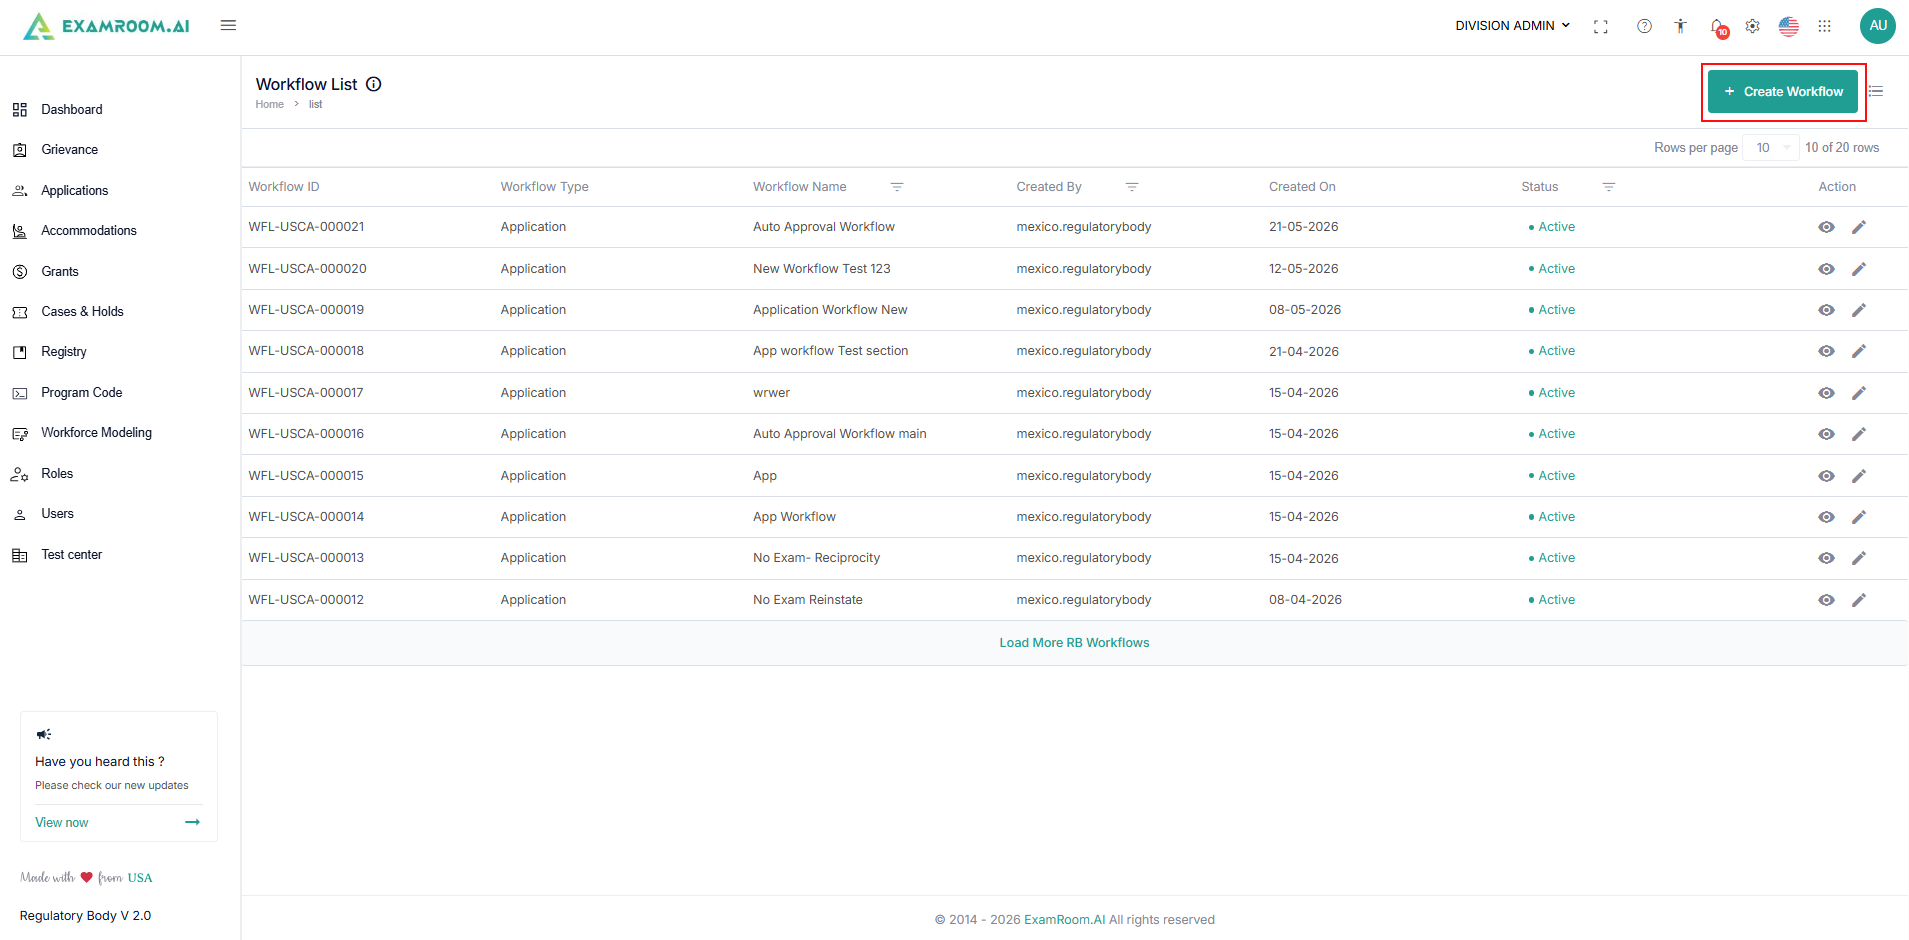
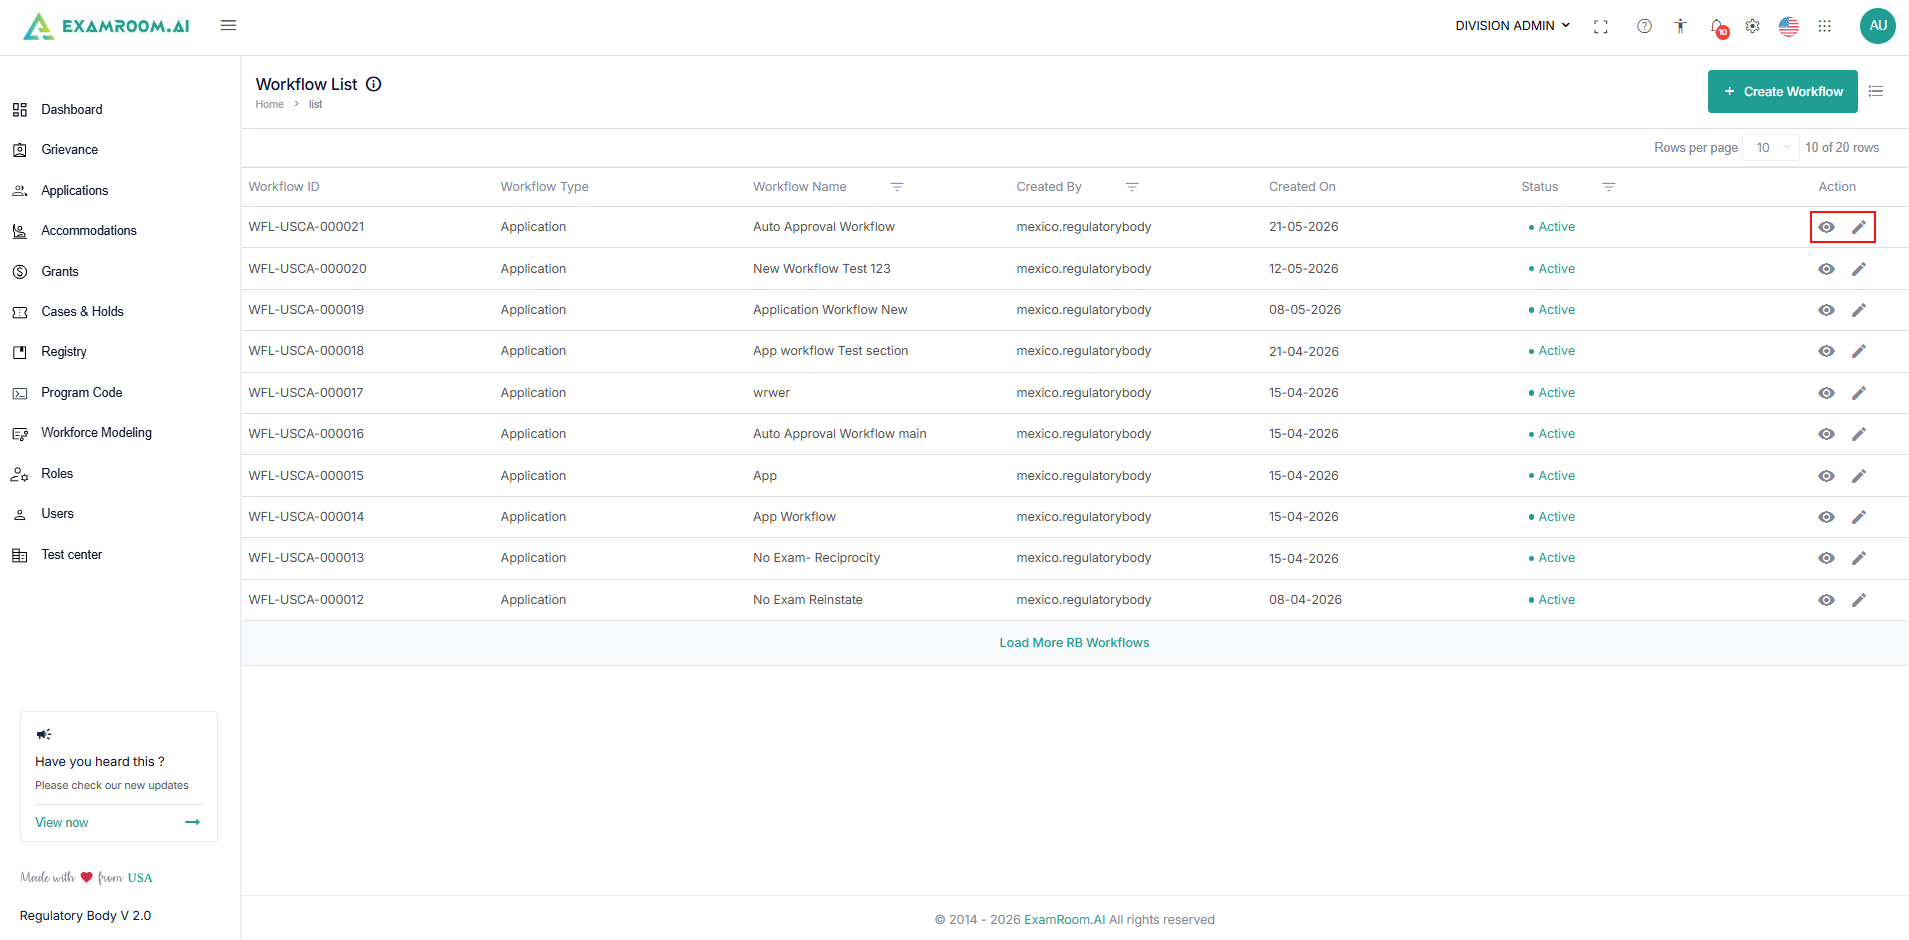
View and manage Workflow
Follow the steps below to view and manage the existing workflow:
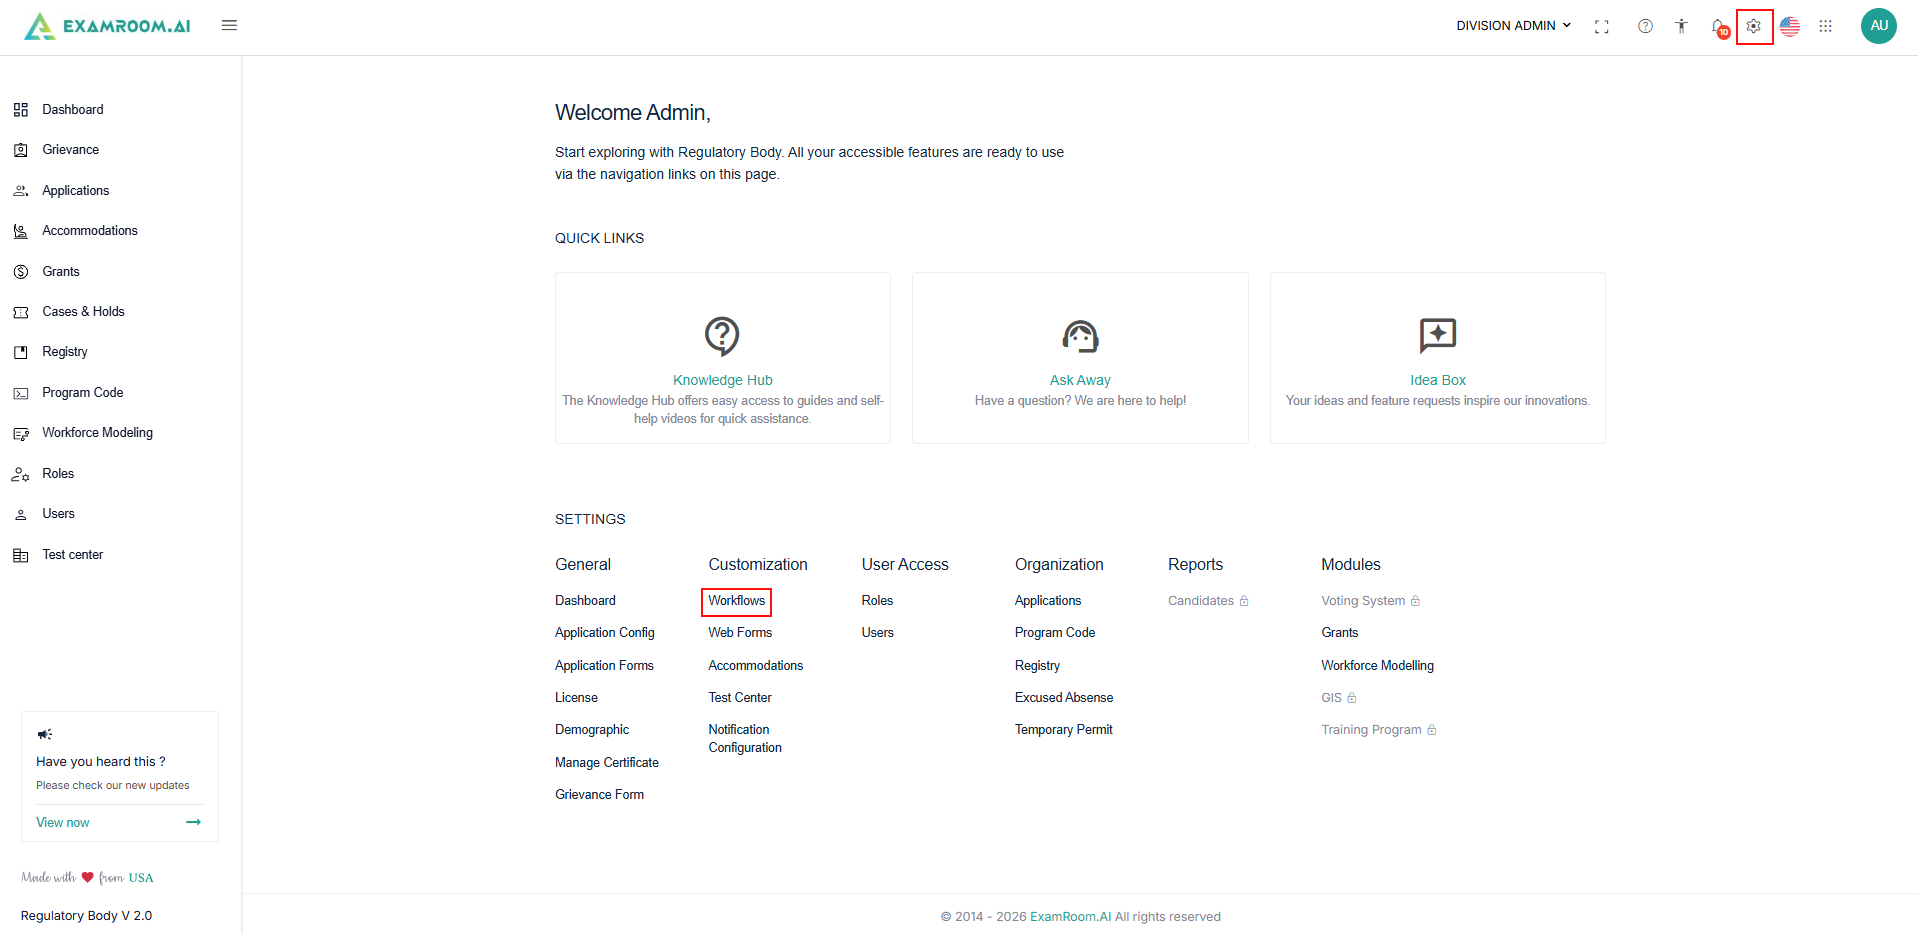
- Navigate to Settings, under Customization, select Workflows.
- The Workflow List page displays all configured workflows, and the list includes follow details:
- Workflow ID: The unique workflow ID is displayed.
- Workflow Type: the type of the workflow is displayed.
- Workflow Name: name of the workflow.
- Created By: name of the user who created the workflow.
- Created On: workflow creation date
- Status: Workflow status is displayed.
- Actions: Click the View icon to view the workflow, or the Edit icon to edit it.
- To edit an existing workflow, click the Edit icon provided under the action column, and refer to the create workflow section to know about the options available to modify the workflow.
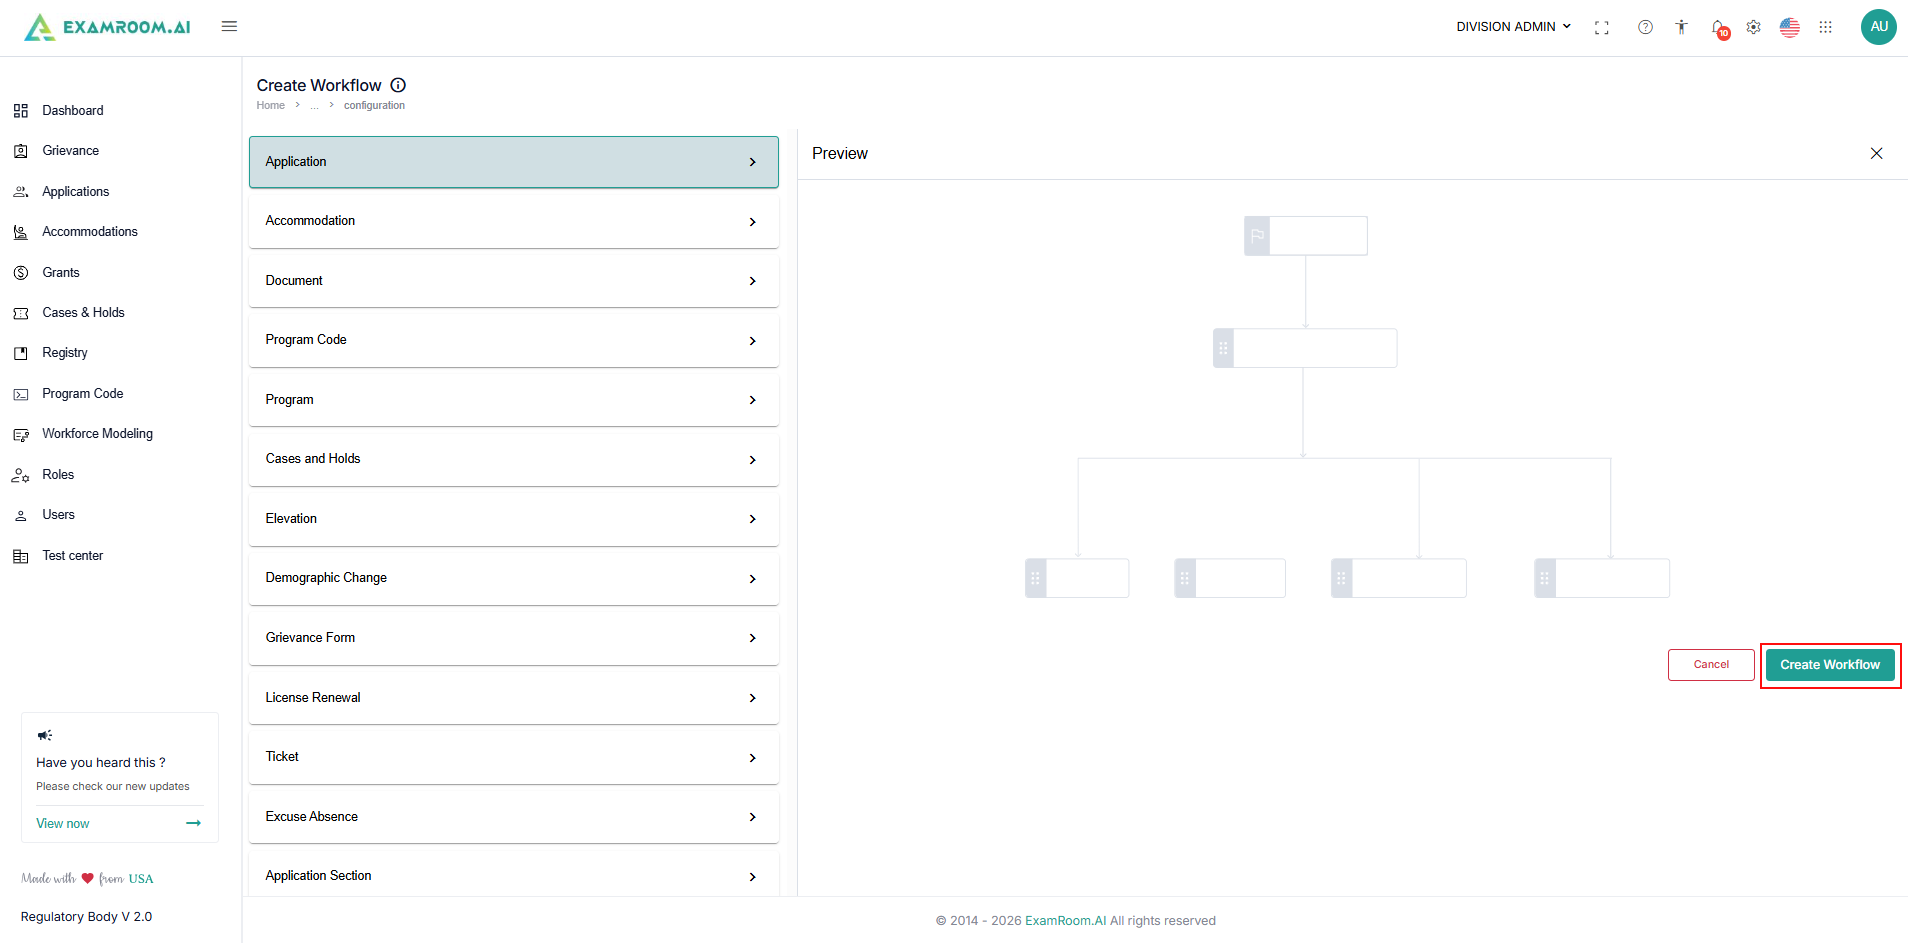
Create a Workflow
Follow the steps below to create workflows to define the sequence of statuses and actions for a business process:
- Navigate to the Workflow from Settings.
- Click the + Create Workflow button.
- Select the workflow type from the left panel:
- Application
- Accommodation
- Document
- Program Code
- Program
- Cases and Holds
- Elevation
- Demographic Change
- Grievance Form
- License Renewal
- Ticket
- Excuse Absence
- Application Section
- Select the workflow category you want to configure, and a workflow preview template appears in the preview section.
- Click the Create Workflow button provided at the bottom of the preview section.
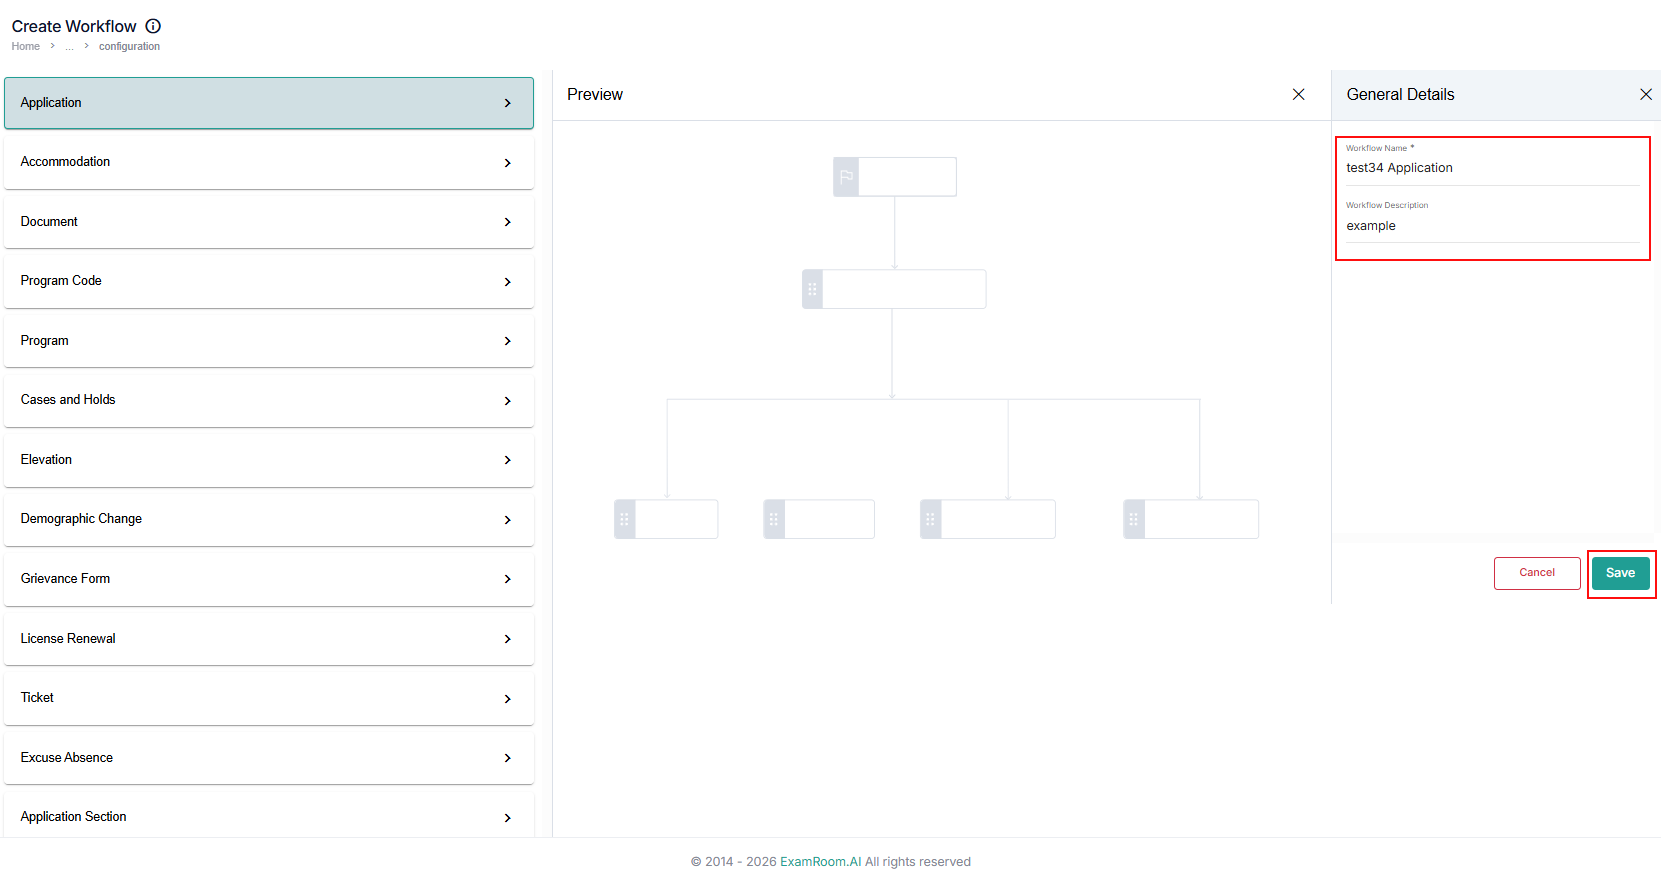
- Enter the Workflow Name and Description under the General Details section.
- Click Save to proceed.
- Click the Create Workflow button provided at the bottom of the preview section.
- Configure Workflow Statuses: The left panel contains available workflow statuses. For example:
- Approved
- ATT Issued
- ATT Expired
- Awaiting Approval
- Awaiting Results
- Awaiting Revision
- Blocked
- Canceled
- Denied
- Exam Canceled
- Failed
- Granted
Note: The workflow status in the left panel may vary depending on the workflow selected.
- To add the structure:
- Drag a status from the left panel.
- Drop it onto the workflow canvas.
- Repeat for all required statuses.
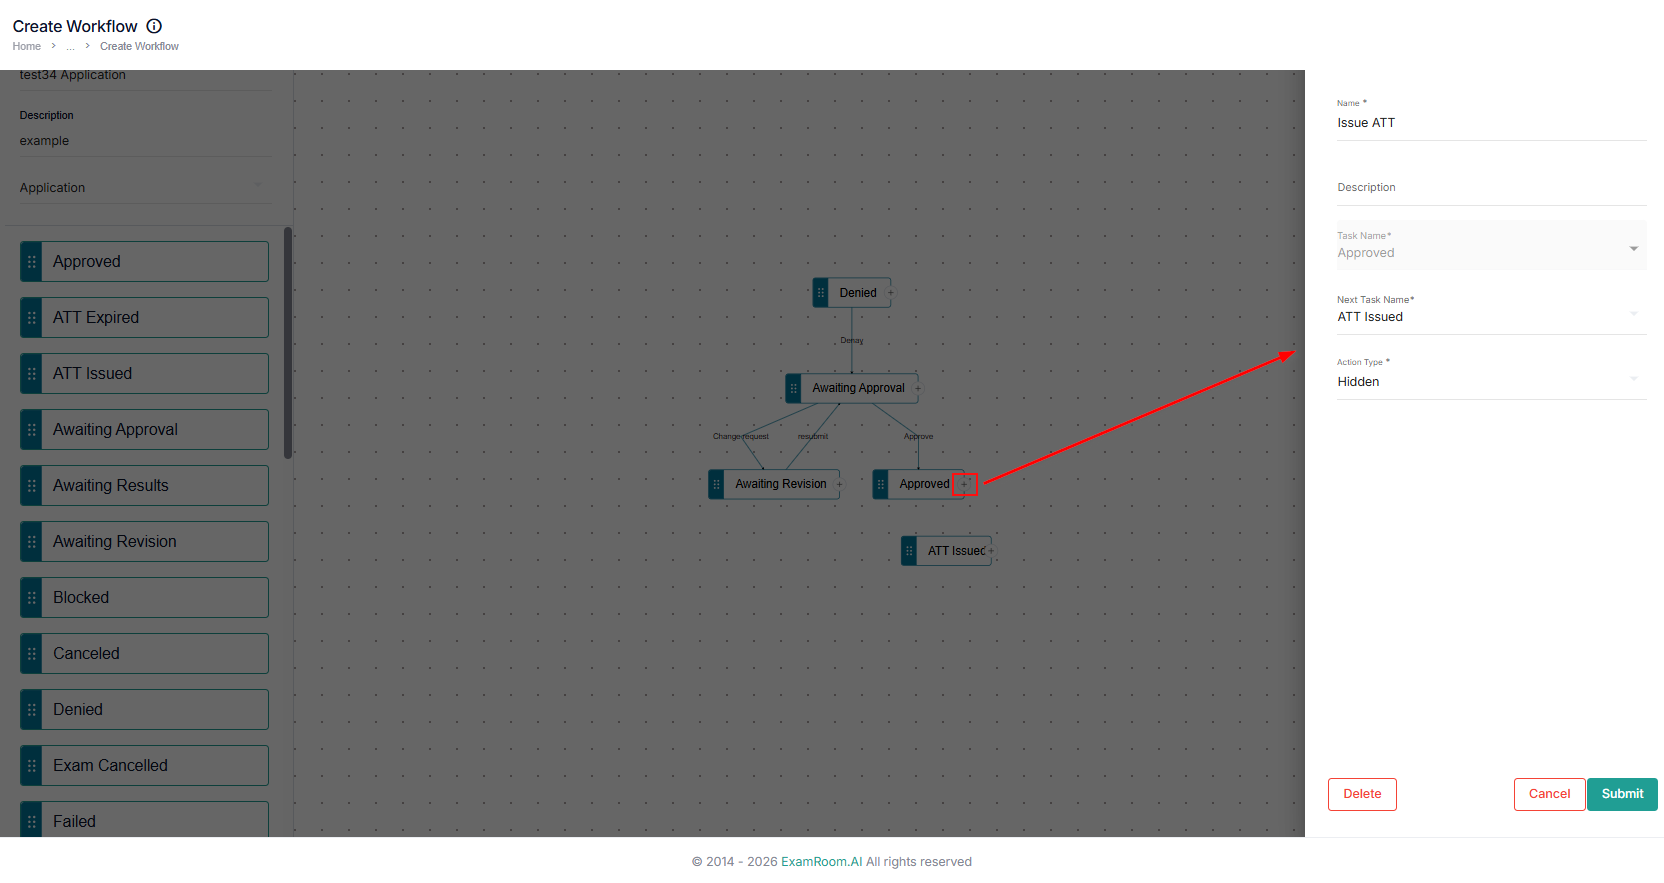
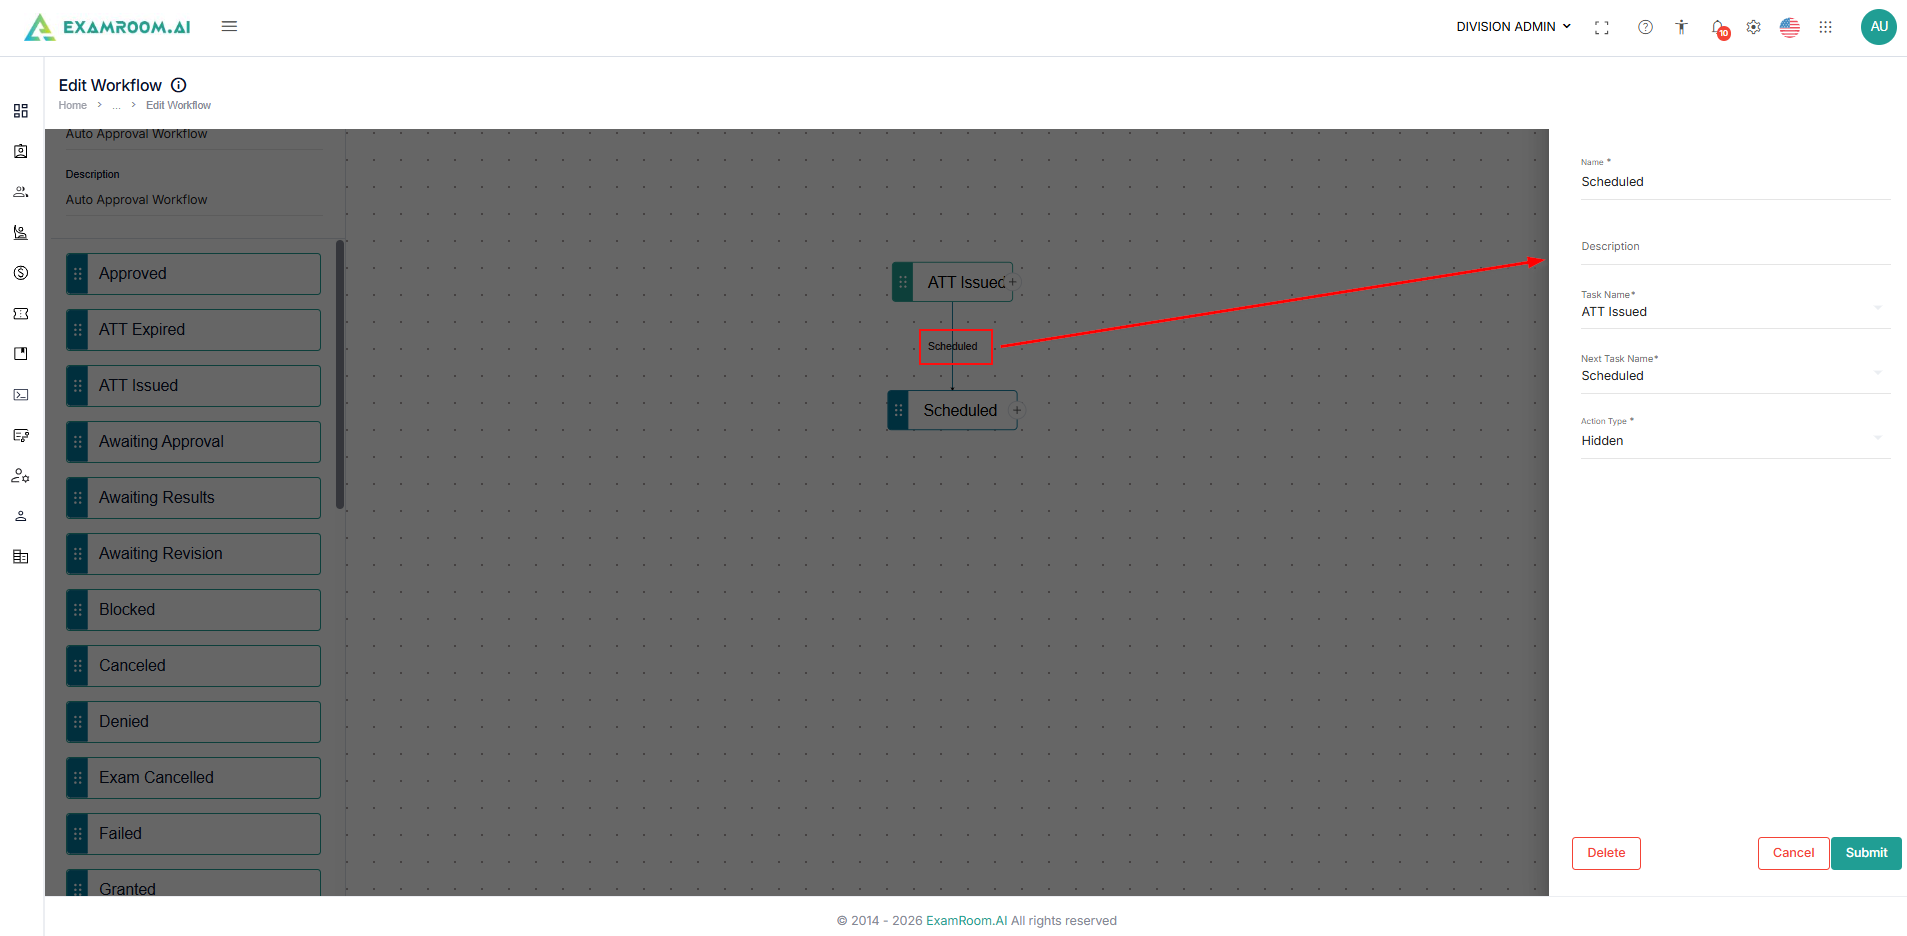
- After placing statuses, create status transitions:
- Click the + connector on a status node.
- Enter the description of the branch.
- Select the Next Task name to link and configure the action name and type. Note that the drop-down will show only options that are available in the canvas to link to the next step.
- Once configured, click the Submit button.
- Click Cancel to go back to the canvas without saving.
- Click Delete to remove the selected status from the canvas.
- If you wish to link a transition to multiple statuses for a single status. Click the + connector on a status node again, then configure it as mentioned above.
- To edit the same transition again, you have just saved. Click the Transition Name, update, and submit again to save the changes.
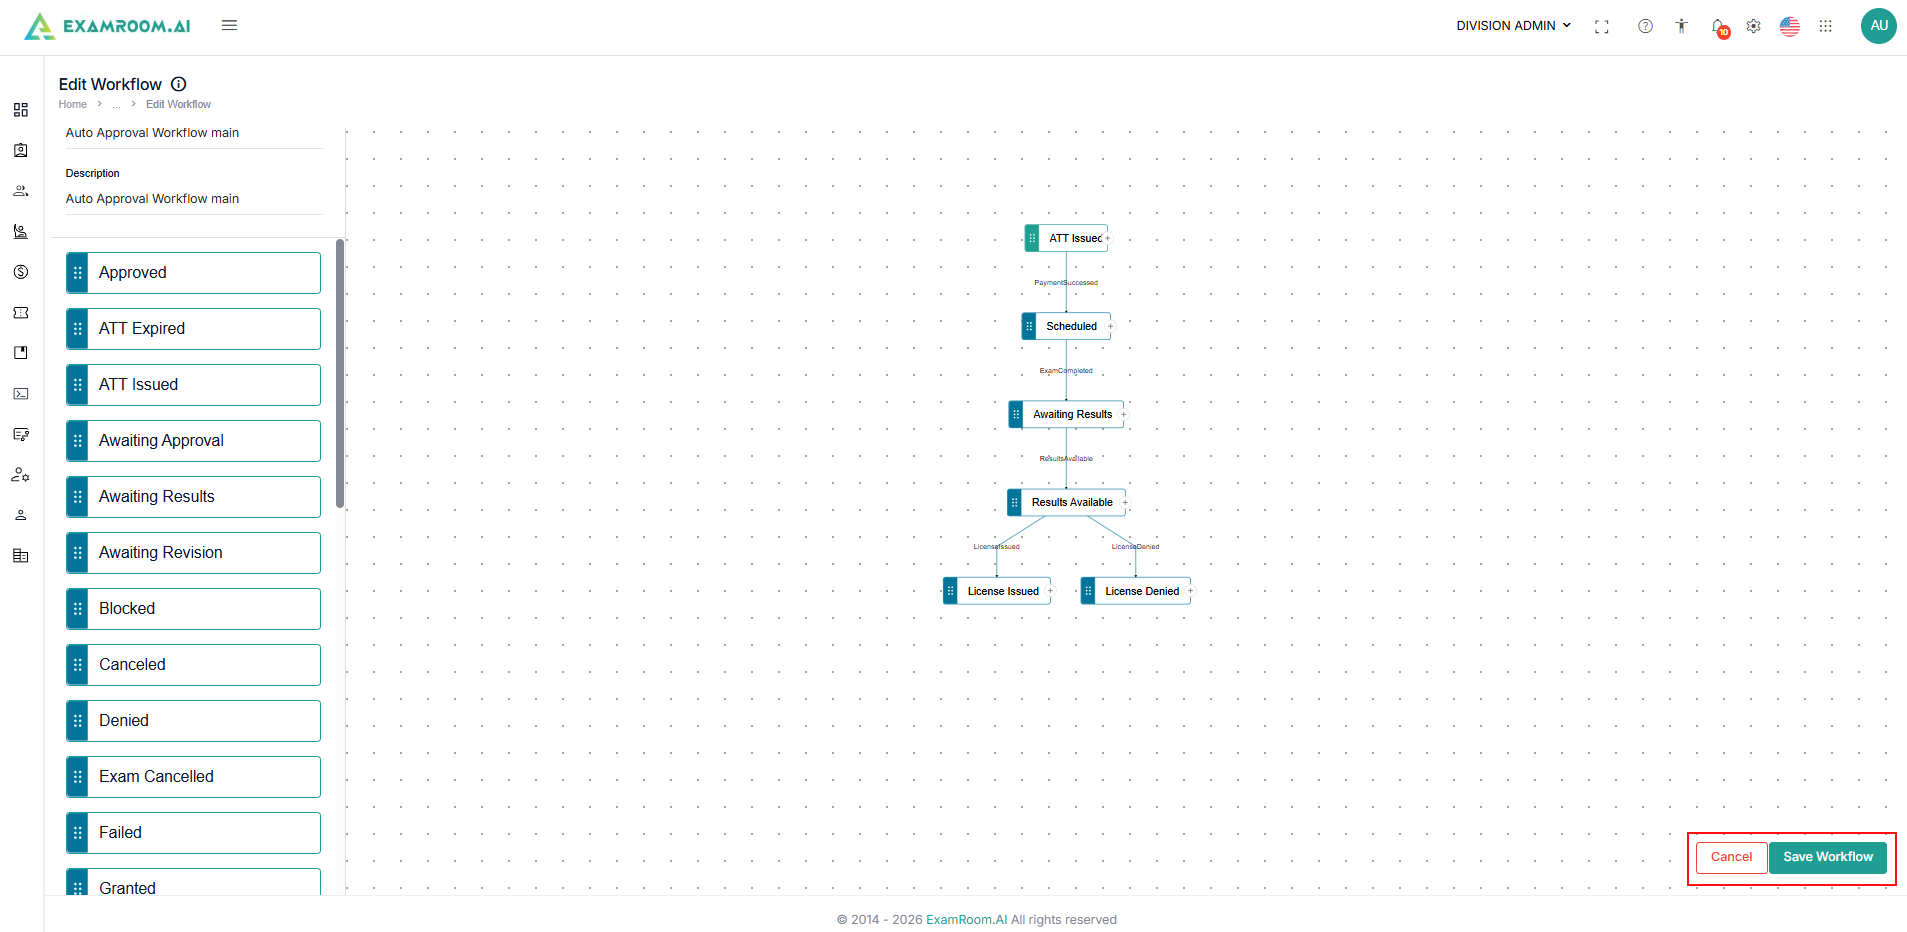
- Once you have created a workflow, click Save Workflow.
- Click Cancel to discard.
Note: If the Save Workflow button is not visible at the bottom right, try scrolling and dragging the page to reveal it.
- Click Cancel to discard.