Users
The RB User section is designed to manage user profiles within the Regulatory Body (RB) platform. This section allows you to add, update, and deactivate user profiles, assign roles, and set roles to ensure secure and efficient access to the system.
Perform the steps below to navigate to the User section:
- Click the left navigation menu and select the Users option from the list.
- The User List is displayed with All Users, Invited Users, and Bookmarks.
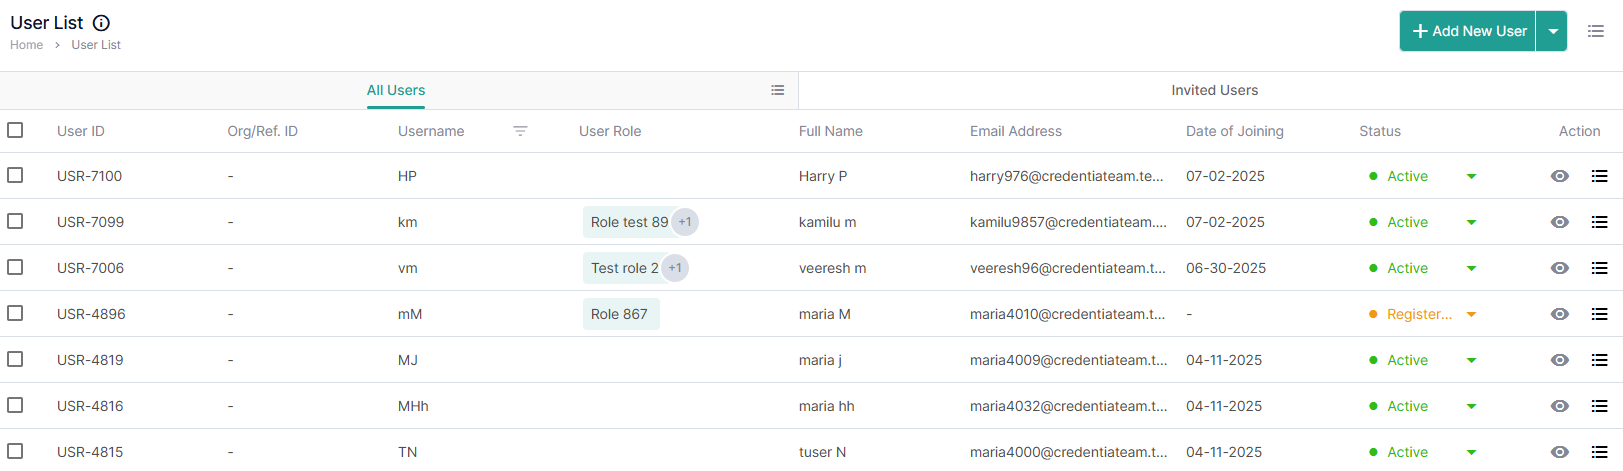
All Users
The All-Users tab displays the list of existing users in the console.
The following are the table items:
- User ID: Displays the unique ID generated when a user is created.
- Org/Ref ID: Displays the organization or the reference ID.
- Username: Displays the username of the ID created.
- User Role: Displays the role assigned to the user.
- Full Name: Displays the full name of the user.
- Email Address: Displays the email address of the user.
- Date of Joining: Displays the date of joining when the user joins for the first time, after creating and setting up the user's password at any given time.
- Status: Displays the status of the user
- Action: This column allows you to view and edit the user details.

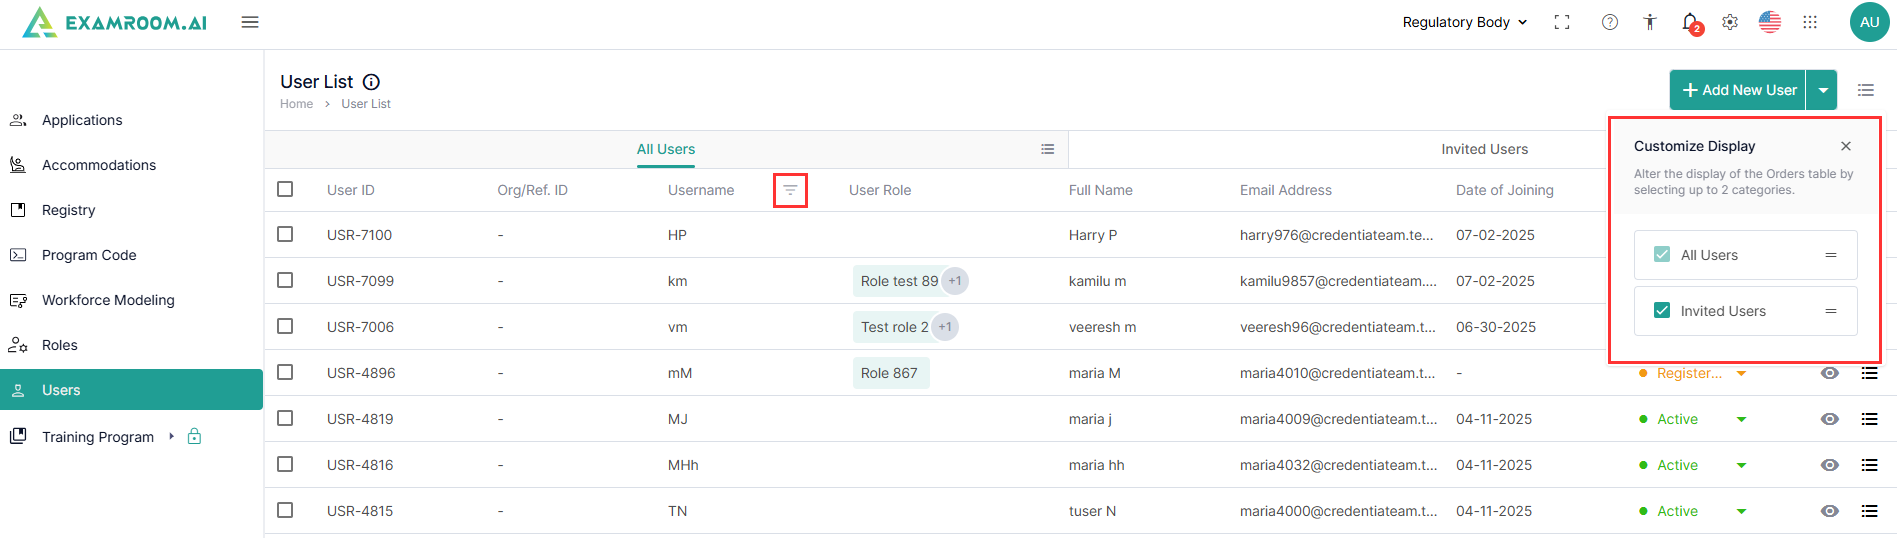
Use the options below to view the customized display of the table items:
- Click the
Hamburger Menu at the right of the All-User page and select the required check boxes to view the customized display of the table items.
- In the Username column, click
Filter and enter the username to search for users in the table.
- Click the View icon to view the user’s details.
- In the Action column, click Hamburger Menu to expand the Edit User and Bookmark options.
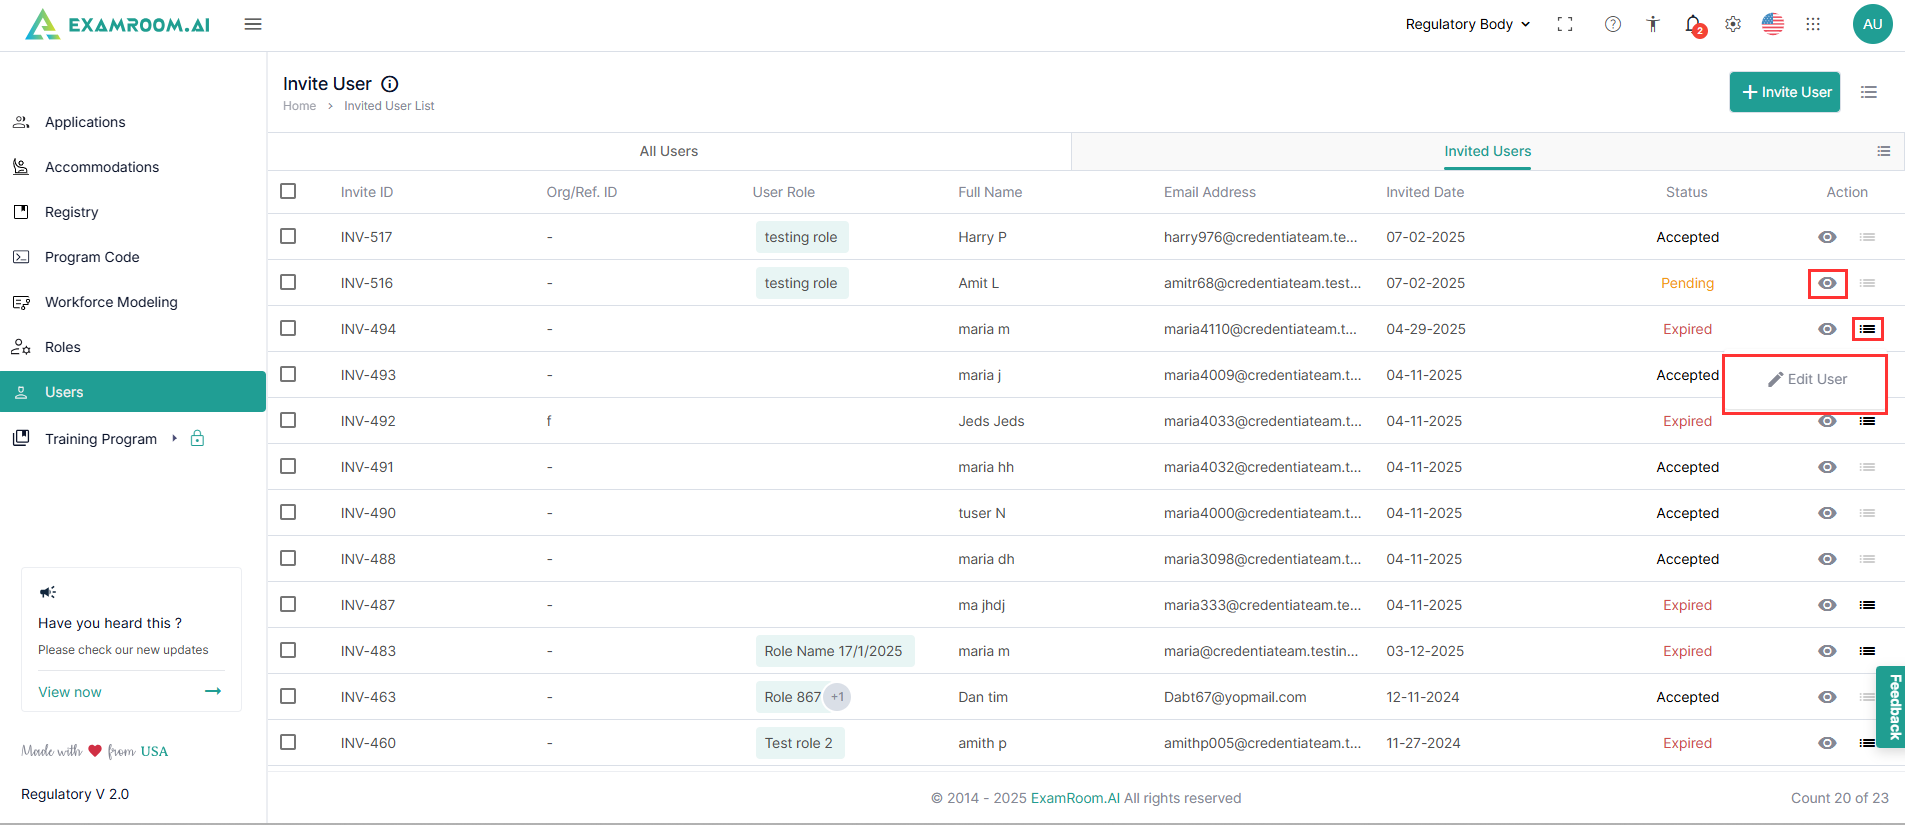
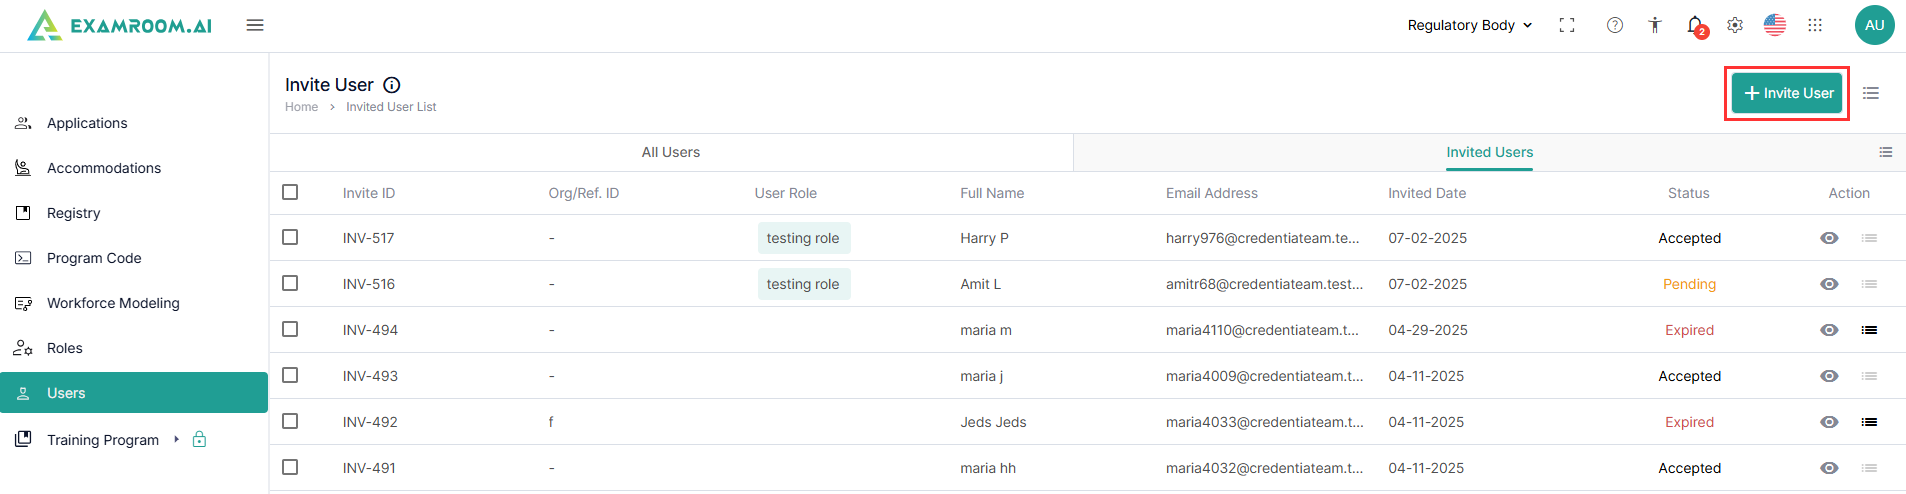
Invite Users
- Click on the Invite User header.
Note: The Invited User header displays a list of all invited users and their statuses. - Click the Invite User button to invite a new user.
- View the User Details page with the following options.
- Single
- Group
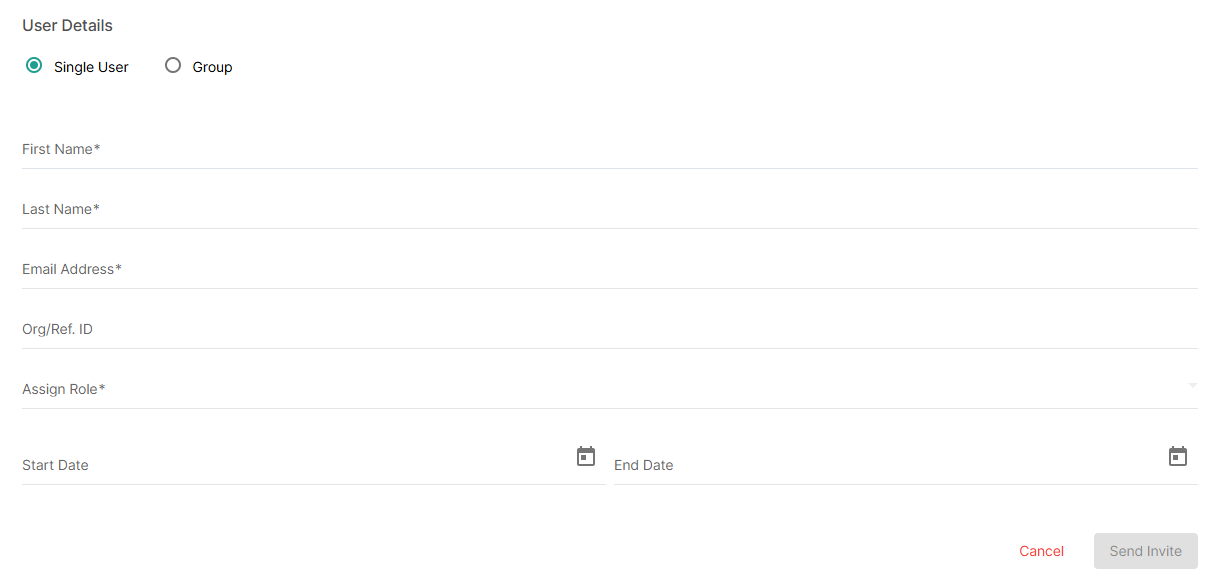
Invite a Single User
To invite a single user, follow the steps below:
- On the User details page, select the Single User option to invite a single user.
- Enter the fields such as First Name, Last Name, Email Address, and Org/Ref.ID.
- Select the Assign Role from the dropdown options.
- Click Calendar to select the Start Date and End Date.
Note: The invited user will be active from the selected start date to the end date.
- Click Send Invite to send the invite to the user.
OR
Click Cancel to exit the window.
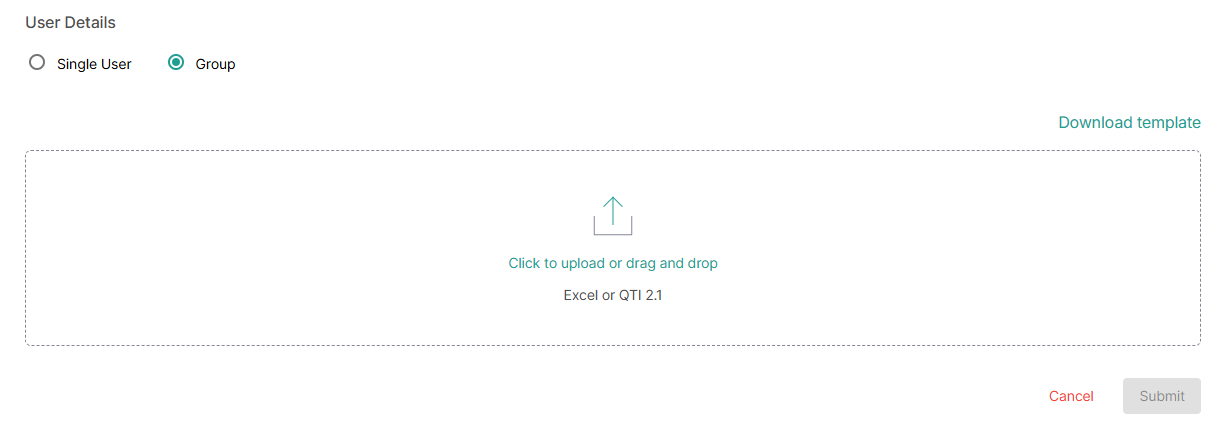
Group User
To invite multiple users to the console, follow these steps:
- On the User Details page, select the Group option to invite the group of users.
- Click the Download Template option to download the group invite into a Microsoft® Excel template.
- In the downloaded template, enter the Email ID, Org/Ref ID, First Name, Last Name, Assign Role, Start Date, and End Date.
Note:- The invited user will be active from the selected start date to the end date.
- Use the Role sheet to look up possible role titles. To add multiple roles, use commas to separate each role in the Assign Role Column.
- Once the Group invite sheet has the mandatory columns filled out, save the sheet to your computer.
- To upload the saved group, invite Excel file, follow one of the following steps:
- Drag and drop the Excel file into the box.
- Click in the box to open the selector dialog and select the group invite Excel file from your local computer.
- After uploading the Excel file, click Submit to invite the bulk users to the console.
OR
Click Cancel to exit the window.
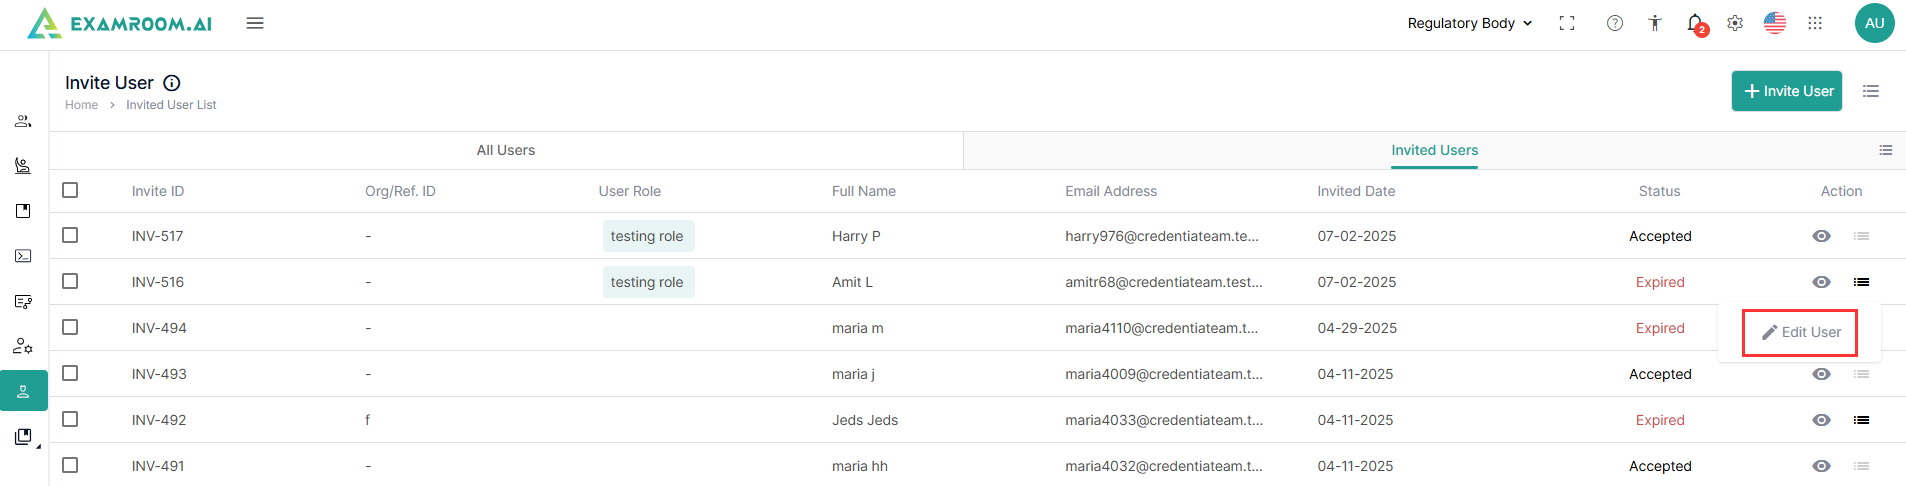
Edit User
- To edit a user, click the
- Following is the display of actions:
- Edit User
- Bookmark
- Click the Edit User option to edit the user details.
- On the Edit User page, update the required changes and click Submit to save the user information and role.
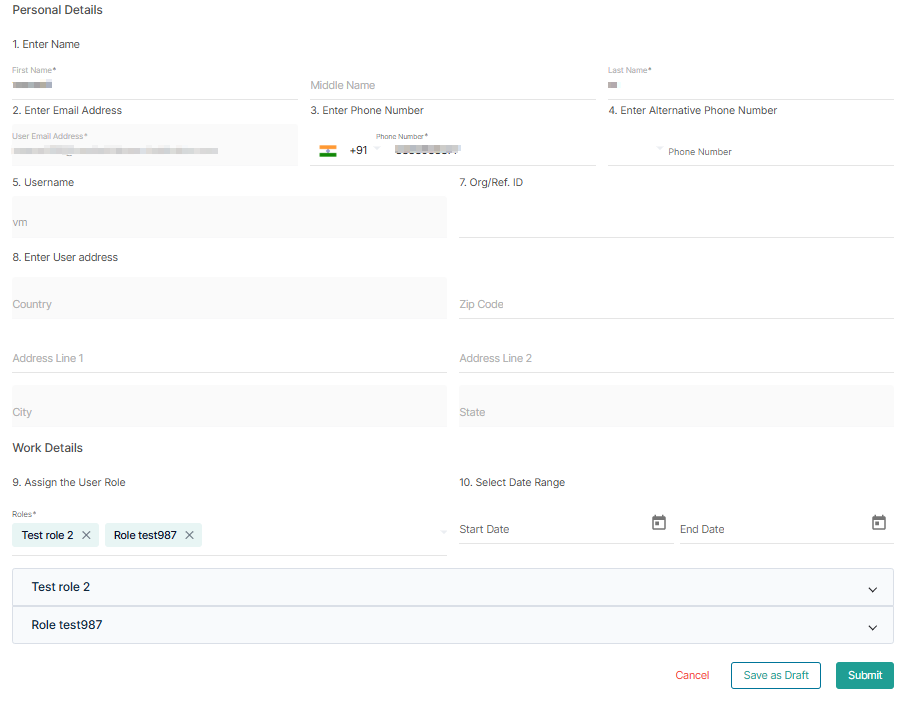
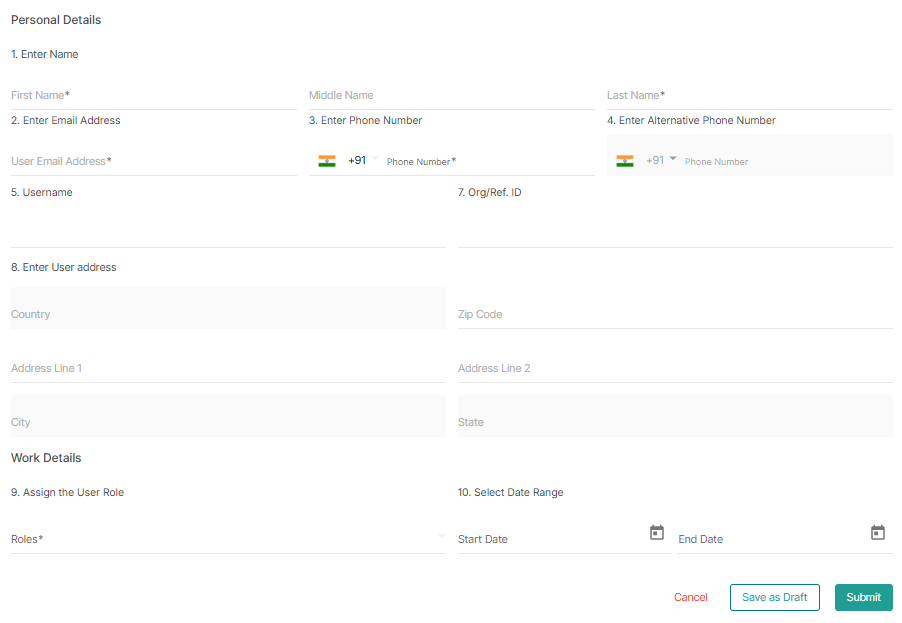
Adding a New User
To add a new user, follow these steps:
- On the User List page, click the Add New User button to add a new user to the console.
- On the Personal Details page, to add a new user, enter the following user information.
- Enter the first, middle, and last names in the required fields.
- Enter the email address, phone number, and alternative phone number.
- Username will be auto-populated based on the name given, and enter the Organization or Reference ID.
- Enter the user address and fill out the Zip code to auto-populate the country, city, and state fields.
- In the Work details, assign the user role from the dropdown menu and select the Start and end dates of the user.
- After entering all the details, click Submit to save and create the new user.
OR
Click Cancel to exit the page.